Introduction

前回は導入手順の紹介しました。
C#をサポートしているので、試してみないわけにはいきません。
Pythonもサポートしており、簡単にテストできそうです。
内容としては、C#(クライアント)-Python(サーバー)とし、クライアントから送信した画像をサーバー側で反転して返すというプログラムになります。
今回のソースは下記になります。

Preparation

C#側は前回インストールしましたので省略します。

Python

Pythonにもインストールしておきます。
Pythonインタープリターは、いつも通りMinicondaになります。
pipでインストールする場合は、pipのバージョンが8以降であることが条件です。
バージョンは下記の手順で確認。

1
2
C:\Program Files\Miniconda2>python -m pip --version
pip 9.0.1 from C:\Program Files\Miniconda2\lib\site-packages (python 2.7)

gRPCをインストールします。

1
2
3
4
5
6
7
8
9
10
11
12
13
14
15
16
17
C:\Program Files\Miniconda2>python -m pip install grpcio
Collecting grpcio
Downloading grpcio-1.2.0-cp27-cp27m-win_amd64.whl (1.1MB)
100% |################################| 1.1MB 846kB/s
Requirement already satisfied: six>=1.5.2 in c:\program files\miniconda2\lib\site-packages (from grpcio)
Collecting protobuf>=3.2.0 (from grpcio)
Downloading protobuf-3.2.0-py2.py3-none-any.whl (360kB)
100% |################################| 368kB 1.8MB/s
Requirement already satisfied: enum34>=1.0.4 in c:\program files\miniconda2\lib\site-packages (from grpcio)
Collecting futures>=2.2.0 (from grpcio)
Downloading futures-3.0.5-py2-none-any.whl
Requirement already satisfied: setuptools in c:\program files\miniconda2\lib\site-packages\setuptools-20.3-py2.7.egg (from protobuf>=3.2.0->grpcio)
Installing collected packages: protobuf, futures, grpcio
Found existing installation: protobuf 2.6.1
Uninstalling protobuf-2.6.1:
Successfully uninstalled protobuf-2.6.1
Successfully installed futures-3.0.5 grpcio-1.2.0 protobuf-3.2.0

続いて、gRPC toolsをインストールします。

1
2
3
4
5
6
7
8
9
10
11
12
C:\Program Files\Miniconda2>python -m pip install grpcio-tools
Collecting grpcio-tools
Downloading grpcio_tools-1.2.0-cp27-cp27m-win_amd64.whl (1.5MB)
100% |################################| 1.5MB 687kB/s
Requirement already satisfied: grpcio>=1.2.0 in c:\program files\miniconda2\lib\site-packages (from grpcio-tools)
Requirement already satisfied: protobuf>=3.2.0 in c:\program files\miniconda2\lib\site-packages (from grpcio-tools)
Requirement already satisfied: six>=1.5.2 in c:\program files\miniconda2\lib\site-packages (from grpcio>=1.2.0->grpcio-tools)
Requirement already satisfied: enum34>=1.0.4 in c:\program files\miniconda2\lib\site-packages (from grpcio>=1.2.0->grpcio-tools)
Requirement already satisfied: futures>=2.2.0 in c:\program files\miniconda2\lib\site-packages (from grpcio>=1.2.0->grpcio-tools)
Requirement already satisfied: setuptools in c:\program files\miniconda2\lib\site-packages\setuptools-20.3-py2.7.egg (from protobuf>=3.2.0->grpcio-tools)
Installing collected packages: grpcio-tools
Successfully installed grpcio-tools-1.2.0

gRPC toolsは proto というファイルから、サーバー、クライアント側のコードを生成するためのジェネレーターになります。

Source

gRPC tools

protoファイルを用意して、サーバー、クライアントのコードを生成します。

imageProc.proto

サンプルが github にありますが、面白くないので、手を加えます。

1
2
3
4
5
6
7
8
9
10
11
12
13
14
15
16
17
18
19
20
21
22
syntax = "proto3";

package imageProc;

service ImageProc {
rpc Enhancement (EnhancementRequest) returns (EnhancementReply) {}
}

message EnhancementRequest {
int32 width = 1;
int32 height = 2;
int32 channel = 3;
bytes image = 4;
}

message EnhancementReply {
int32 result = 1;
int32 width = 2;
int32 height = 3;
int32 channel = 4;
bytes image = 5;
}

続いて、imageProc.protoからコードを生成します。
gRPC toolsから生成しますが、PythonとC#側でそれぞれ生成する必要があります。
また、言語用にそれぞれgRPC toolsがあるので、それぞれ入手します。

for Python

PythonでのgRPC toolsは下記のように使います。

1
python -m grpc_tools.protoc -I<protoファイルの存在ディレクトリ> --python_out=<出力先のパス> --grpc_python_out=<出力先のパス> <protoファイルのパス> 

今回のソース構成では、gRPC1フォルダにimageProc.protoがありますので、そこをカレントディレクトリにして下記を実行します。

1
python -m grpc_tools.protoc -I. --python_out=python --grpc_python_out=python imageProc.proto 

これにより、Python\imageProc_pb2.pyPython\imageProc_pb2_grpc.py が生成されます。

for C#

C#側は少し面倒です。
まず、nugetを入手します。
これはVisual Studioから実行できるものではなく、スタンドアロンのコマンドラインツールです。
Available NuGet Distribution Versionsから、**nuget.exe - recommended latest (v3.5.0)**を選択します。
ダウンロードしたnuget.exeを適切な場所に展開し、ソースフォルダのpackagesフォルダをカレントディレクトにして、次のコマンドを入力します。

1
2
3
4
5
6
7
8
9
10
11
12
13
14
15
16
17
18
19
20
D:\Works\Demo\gRPC1\packages>"C:\Program Files\NuGet\nuget.exe" install Grpc.Tools
Feeds used:
https://api.nuget.org/v3/index.json
C:\Program Files (x86)\Microsoft SDKs\NuGetPackages\

GET https://api.nuget.org/v3/registration1-gz/grpc.tools/index.json
OK https://api.nuget.org/v3/registration1-gz/grpc.tools/index.json 672ms

Attempting to gather dependency information for package 'Grpc.Tools.1.2.0' with
respect to project 'D:\Works\Demo\gRPC1\packages', targeting 'Any,Version=v0.0'
Gathering dependency information took 15.35 ms
Attempting to resolve dependencies for package 'Grpc.Tools.1.2.0' with DependencyBehavior 'Lowest'
Resolving dependency information took 0 ms
Resolving actions to install package 'Grpc.Tools.1.2.0'
Resolved actions to install package 'Grpc.Tools.1.2.0'
Retrieving package 'Grpc.Tools 1.2.0' from 'nuget.org'.
Adding package 'Grpc.Tools.1.2.0' to folder 'D:\Works\Demo\gRPC1\packages'
Added package 'Grpc.Tools.1.2.0' to folder 'D:\Works\Demo\gRPC1\packages'
Successfully installed 'Grpc.Tools 1.2.0' to D:\Works\Demo\gRPC1\packages
Executing nuget actions took 176.33 ms

カレントディレクトリにGrpc.Tools.1.2.0が作成されます。
続いて、コードを生成します。
構文はPythonと似ています。

1
protoc.exe -I<protpファイルの存在ディレクトリ> --csharp_out <出力先のパス> --grpc_out <出力先のパス> <protoファイルのパス> --plugin=protoc-gen-grpc=<grpc_csharp_plugin.exeのパス> 

grpc_csharp_plugin.exeは先ほどのnuget.exeでGrpc.Toolsをインストールした際に、同時にインストールされます。
ですので、下記のようにしてimageProc.protoからコードを生成します。

1
D:\Works\Demo\gRPC1>mkdir gRPC\Contracts D:\Works\Demo\gRPC1>packages\Grpc.Tools.1.2.0\tools\windows_x86\protoc.exe -I. --csharp_out gRPC\Contracts --grpc_out gRPC\Contracts imageProc.proto --plugin=protoc-gen-grpc=packages\Grpc.Tools.1.2.0\tools\windows_x86\grpc_csharp_plugin.exe 

これにより、gRPC\Contracts\ImageProc.csgRPC\Contracts\ImageProcGrpc.cs が生成されます。

Python

コードの生成が完了したので、Python側でgRPCを利用するコードを記述していきます。

imageProc_server.py

xxx_pb2_grpc.py というファイルにて、クライアント、サービスの基底クラスが定義されていますので、これらから派生したクラスを実装していきます。
Python側がサーバーになるので、ImageProcServicerから派生します。

1
2
3
4
5
6
7
8
9
10
11
12
13
14
15
16
17
18
19
20
21
22
23
24
25
26
27
28
29
30
31
32
33
34
35
36
37
38
39
40
41
42
43
44
45
46
47
48
49
50
51
52
53
54
55
56
57
58
59
60
61
62
63
64
65
from concurrent import futures
import time

import grpc

from PIL import Image
import PIL.ImageOps
import imageProc_pb2
import imageProc_pb2_grpc

_ONE_DAY_IN_SECONDS = 60 * 60 * 24

class ImageProc(imageProc_pb2_grpc.ImageProcServicer):
def Enhancement(self, request, context):
reply = imageProc_pb2.EnhancementReply()
reply.width = request.width
reply.height = request.height
reply.channel = request.channel

imageSize = request.width, request.height
# 1 (1-bit pixels, black and white, stored with one pixel per byte)
# L (8-bit pixels, black and white)
# P (8-bit pixels, mapped to any other mode using a colour palette)
# RGB (3x8-bit pixels, true colour)
# RGBA (4x8-bit pixels, true colour with transparency mask)
# CMYK (4x8-bit pixels, colour separation)
# YCbCr (3x8-bit pixels, colour video format)
# I (32-bit signed integer pixels)
# F (32-bit floating point pixels)
channel = request.channel
if channel == 4:
print('channel is 4')
# PIL.ImageOps.invert does NOT support RGBA
tmp = Image.frombytes('RGBA', imageSize, request.image)
r, g, b, a = tmp.split()
rgb = Image.merge("RGB", (b, g, r))
inverted = PIL.ImageOps.invert(rgb)
r, g, b = inverted.split()
reply.image = Image.merge("RGBA", (r, g, b, a)).tobytes()
elif channel == 3:
print('channel is 3')
reply.image = PIL.ImageOps.invert(Image.frombytes('RGB', imageSize, request.image)).tobytes()
elif channel == 1:
print('channel is 1')
reply.image = PIL.ImageOps.invert(Image.frombytes('1', imageSize, request.image)).tobytes()
else:
print('channel is unknown')
reply.image = PIL.ImageOps.invert(Image.frombytes('L', imageSize, request.image)).tobytes()

reply.result = 0
return reply

def serve():
server = grpc.server(futures.ThreadPoolExecutor(max_workers=10))
imageProc_pb2_grpc.add_ImageProcServicer_to_server(ImageProc(), server)
server.add_insecure_port('[::]:50051')
server.start()
try:
while True:
time.sleep(_ONE_DAY_IN_SECONDS)
except KeyboardInterrupt:
server.stop(0)

if __name__ == '__main__':
serve()

ImageProcは自動生成されたImageProcServicerから派生して適宜実装します。
今回は、入力されたバイナリデータを反転する処理を書いています。
main関数はserve関数を呼び出しています。
serve関数は、https://github.com/grpc/grpc/blob/master/examples/python/helloworld/greeter_server.pyを参考に記述しますので簡単です。

C#

MVVMで実装します。
画像ファイルを読み込むボタン、読み込んだ画像を表示するパネル、サーバーと通信するための送信ボタン、サーバーからの結果を表示するためのパネルを備えています。
また、実装を開始する前に、nugetでGoogle.Protobufをインストールします。

MainViewModel.cs

まずは、interfaceです。
Xaml上のButtonに対応するCommandと、Imgaeに対応するImageSourceを備えているだけです。

1
2
3
4
5
6
7
8
9
10
11
12
13
14
15
16
17
18
19
20
21
22
23
24
25
26
27
28
29
30
31
32
33
34
35
36
using System.Windows.Media;
using GalaSoft.MvvmLight.Command;

namespace Grpc1.ViewModels.Interfaces
{

public interface IMainViewModel
{

#region Properties

RelayCommand OpenFileCommand
{
get;
}

ImageSource ResultImage
{
get;
}

RelayCommand ServerRequestCommand
{
get;
}

ImageSource SourceImage
{
get;
}

#endregion

}

}

IMainViewModel.cs

IMainViewModelを継承しています。

1
2
3
4
5
6
7
8
9
10
11
12
13
14
15
16
17
18
19
20
21
22
23
24
25
26
27
28
29
30
31
32
33
34
35
36
37
38
39
40
41
42
43
44
45
46
47
48
49
50
51
52
53
54
55
56
57
58
59
60
61
62
63
64
65
66
67
68
69
70
71
72
73
74
75
76
77
78
79
80
81
82
83
84
85
86
87
88
89
90
91
92
93
94
95
96
97
98
99
100
101
102
103
104
105
106
107
108
109
110
111
112
113
114
115
116
117
118
119
120
121
122
123
124
125
126
127
128
129
130
131
132
133
134
135
136
137
138
139
140
141
142
143
144
145
146
147
148
149
150
151
152
153
154
155
156
using System;
using System.Windows;
using System.Windows.Media;
using System.Windows.Media.Imaging;
using GalaSoft.MvvmLight;
using GalaSoft.MvvmLight.Command;
using Google.Protobuf;
using Grpc1.ViewModels.Interfaces;
using ImageProc;
using Microsoft.WindowsAPICodePack.Dialogs;

namespace Grpc1.ViewModels
{

internal sealed class MainViewModel : ViewModelBase, IMainViewModel
{

#region Properties

private RelayCommand _OpenFileCommand;

public RelayCommand OpenFileCommand
{
get
{
return this._OpenFileCommand ?? (this._OpenFileCommand = new RelayCommand(() =>
{
using (var dlg = new CommonOpenFileDialog())
{
dlg.IsFolderPicker = false;
dlg.AddToMostRecentlyUsedList = false;
dlg.AllowNonFileSystemItems = false;
dlg.EnsureFileExists = true;
dlg.EnsurePathExists = true;
dlg.EnsureReadOnly = false;
dlg.EnsureValidNames = true;
dlg.Multiselect = false;
dlg.ShowPlacesList = true;

var dialogResult = dlg.ShowDialog();
if (dialogResult != CommonFileDialogResult.Ok)
return;

var bitmap = new BitmapImage();
try
{
bitmap.BeginInit();
bitmap.UriSource = new Uri(dlg.FileName);
bitmap.EndInit();
this.SourceImage = bitmap;
}
catch (Exception ex)
{
MessageBox.Show(ex.Message);
}
}

this._ServerRequestCommand?.RaiseCanExecuteChanged();
}, () => true));
}
}

private ImageSource _ResultImage;

public ImageSource ResultImage
{
get
{
return this._ResultImage;
}
private set
{
this._ResultImage = value;
this.RaisePropertyChanged();
}
}

private RelayCommand _ServerRequestCommand;

public RelayCommand ServerRequestCommand
{
get
{
return this._ServerRequestCommand ?? (this._ServerRequestCommand = new RelayCommand(async () =>
{
var bitmap = this._SourceImage as BitmapImage;
if (bitmap == null)
return;

var width = bitmap.PixelWidth;
var height = bitmap.PixelHeight;
var stride = (width * bitmap.Format.BitsPerPixel + 7) / 8;
var bitsPerPixel = bitmap.Format.BitsPerPixel;
var bytesPerPixel = bitsPerPixel / 8;
var originalPixels = new byte[width * height * bytesPerPixel];
bitmap.CopyPixels(originalPixels, stride, 0);

try
{
var channel = new Grpc.Core.Channel("127.0.0.1:50051", Grpc.Core.ChannelCredentials.Insecure);
var client = new ImageProc.ImageProc.ImageProcClient(channel);
var reply = await client.EnhancementAsync(new EnhancementRequest
{
Height = height,
Width = width,
Channel = bytesPerPixel,
Image = ByteString.CopyFrom(originalPixels)
});
channel.ShutdownAsync().Wait();

var resultPixels = reply.Image.ToByteArray();
if (resultPixels != null)
{
var bmpSource = BitmapSource.Create(
width,
height,
bitmap.DpiX,
bitmap.DpiY,
bitmap.Format,
null,
resultPixels,
stride);
if (bmpSource.CanFreeze)
bmpSource.Freeze();

this.ResultImage = bmpSource;
}
}
catch
{

}
}, () => this._SourceImage != null));
}
}

private ImageSource _SourceImage;

public ImageSource SourceImage
{
get
{
return this._SourceImage;
}
private set
{
this._SourceImage = value;
this.RaisePropertyChanged();
}
}

#endregion

}

}

OpenFileCommandは、画像ファイルをSystem.Windows.Media.Imaging.BitmapImageに変換して、SourceImageに設定するだけです。
注目は、ServerRequestCommandの下記の部分です。

1
2
3
4
5
6
7
8
9
10
var channel = new Grpc.Core.Channel("127.0.0.1:50051", Grpc.Core.ChannelCredentials.Insecure);
var client = new ImageProc.ImageProc.ImageProcClient(channel);
var reply = await client.EnhancementAsync(new EnhancementRequest
{
Height = height,
Width = width,
Channel = bytesPerPixel,
Image = ByteString.CopyFrom(originalPixels)
});
channel.ShutdownAsync().Wait();

ローカル(127.0.0.1)のポート50051に対して、gRPCで通信を確立し、APIを呼び出しています。
ImageProc.ImageProc.ImageProcClientは、gRPC toolsで自動生成しているものです。
通信に関係するコードはすべて自動で生成されるので、クライアント側は、ちょっとした呼び出しのコードを記述するだけで、簡単にサーバー側のAPIを呼び出せるわけです。

Test

サーバー側とクライアント側をテストしてみます。
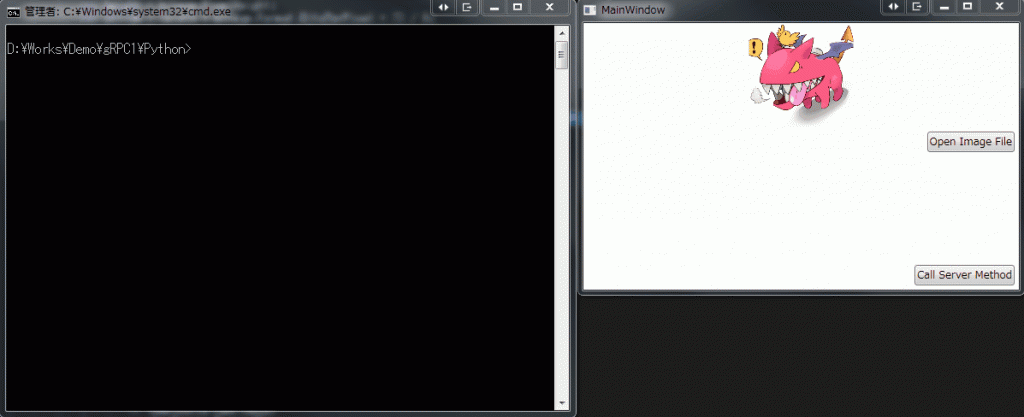
サーバー側(imageProc_server.py)を起動し、任意の画像ファイルを読み込み、サーバー側APIを呼び出すと、反転した画像が返ってきます。

Conclusion

通信周りはすべて自動生成に任せ、ビジネスロジックの実装に注力できるのは、本当に楽です。
今時、ソケットだのコールバックだの考えるのは本当に面倒です。

Source Code

https://github.com/takuya-takeuchi/Demo/tree/master/RemoteProcedureCall/gRPC/01_gRPC1