Introduction

以前から試してみたかった PXE ブートを試してみる。
これができれば、いちいち iso ファイルや CD/DVD メディアを仮想マシンにアタッチしたりする必要がなくなって便利になる。

How to do?

ググると出てくるのは、 dnsmasq を使っての PXE サーバ構築で、よくある事例は dnsmasq で DHCP と TFTP サーバを全て担当してもらう例が多い。
だが、自分のネットワーク環境では既に DHCP サーバ (Buffalo のルータ) が存在しており、dnsmasq に DHCP を担当させるのは影響が大きすぎる。
また、 dnsmasq を使うとしても、 iso ファイルなどは別に用意してあるファイルサーバを使うことで、dnsmasq をインストールしたサーバは極力軽量にしておきたい。

ということで、こんな我儘な要望を実現するために参考にしたのは下記の記事

これを参考にした上で肝となるのは下記の点。

  • dnsmasq の Proxy DHCP 機能を使い、既存の DHCP に IP のリリースを委譲
  • TFTP も外部のサーバを使うよう設定

01. 環境の確認

ネットワーク環境は下記。

  • サブネット: 192.168.11.0/24
  • PXE サーバ (Alpine Linux 3.20.2): 192.168.11.109
  • TFTP サーバ (既存のファイルサーバ): 192.168.11.17
  • DHCP サーバ (既存の Buffalo ルータ): 192.168.11.1

02. dnsmasq のインストール

PXE サーバにインストール。

1
$ apk add dnsmasq

設定ファイルを作成。

1
2
3
4
5
6
7
8
9
10
11
12
13
14
15
16
17
18
19
20
21
22
23
24
25
cat <<EOF > /etc/dnsmasq.conf
# Disable DNS Server
port=0

# logging
log-facility=/var/log/dnsmasq/dnsmasq.log

# Enable dhcp log
log-dhcp

# Respond to PXE requests for the specified network;
# run as DHCP proxy
dhcp-range=192.168.11.1,proxy

# Specify TFPT Server
dhcp-boot=pxelinux/pxelinux.0,192.168.11.17

# Provide network boot options
# The known types are x86PC, PC98, IA64_EFI, Alpha, Arc_x86,
# Intel_Lean_Client, IA32_EFI, ARM_EFI, BC_EFI, Xscale_EFI and X86-64_EFI
# This option is first and will be the default if there is no input from the user.
# ex. pxe-service=<type>,"<name>",<path to bootfile>,<tftp server address>
pxe-service=x86PC,"Network Boot",pxelinux/pxelinux,192.168.11.17

EOF

dnsmasq を自動起動するように設定し、再起動。

1
2
3
$ mkdir /var/log/dnsmasq
$ rc-update add dnsmasq boot
$ rc-service dnsmasq start

03. ブート設定ファイルの作成

今回は先のブログの記事を参考にして、OS ではなく memtest86+ を起動するようにする。
参考記事では古いバージョン (そもそも記事自体が 8 年前!!) なので、最新の memtest86+ を使うようにした。

1
2
3
4
5
6
7
default memtest86
prompt 1
timeout 15

label memtest86
menu label Memtest86+ v7.00
kernel /memtest/v7.00/memtest64

このようなテキストファイルを TFTP サーバの公開ディレクトリから見て pxelinux/pxelinux.cfg/default として保存する。

04. memtest86+ の展開

memtest86+ v7.00 をダウンロード。
展開後、memtest64.bin を TFTP サーバの公開ディレクトリから見て pxelinux/memtest/v7.00/memtest64 として保存する。
注意するのは、必ず拡張子の .bin は削除して保存すること。
そうしないと正しくブートしない。

05. TFTP の疎通試験

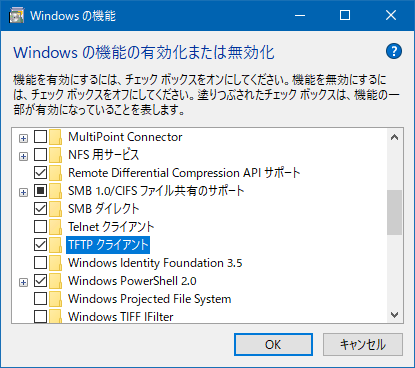
TFTP は WinSCP ではサポートされていないため、手軽に確認したいなら Windows の追加機能で実現できる。

tftp

インストール後、下記のように指定する。

1
2
$ tftp -i 192.168.11.17 GET pxelinux/pxelinux.cfg/default
転送を正常に完了しました: 1 秒間に 124 バイト、124 バイト/秒

06. linux のブートイメージを準備

linux ならどのディストリビューションでもいい (と思う) ので、 syslinux パッケージをインストールし、ブートイメージを取り出す。

1
$ apk add syslinux

インストール後、 /usr/share/syslinux 配下の

  • ldlinux.c32
  • pxelinux.0

を TFTP サーバの公開ディレクトリから見て pxelinux の配下に保存する。

現時点で、公開ディレクトリは下記のようになっている筈。

1
2
3
4
5
6
7
8
9
10
11
(公開ディレクトリ)
└─pxelinux
│ ldlinux.c32
│ pxelinux.0

├─memtest
│ └─v7.00
│ memtest64

└─pxelinux.cfg
default

これで準備完了。

07. PXE ブートしてみる

今回は VMware ESXi 上の仮想マシンで確認してみた。
設定で UEFI ではなく BIOS で起動するように設定しておくこと。
PXE ブートが始まると、PXE サーバ側に要求が飛んできて、ブートに必要な情報が流れてくるのがわかる。

1
2
3
4
# tail -f /var/log/dnsmasq/dnsmasq.log
Aug 24 07:36:21 dnsmasq[3692]: started, version 2.90 DNS disabled
Aug 24 07:36:21 dnsmasq[3692]: compile time options: IPv6 GNU-getopt no-DBus no-UBus no-i18n no-IDN DHCP DHCPv6 no-Lua TFTP no-conntrack ipset no-nftset auth no-cryptohash no-DNSSEC loop-detect inotify dumpfile
Aug 24 07:36:21 dnsmasq-dhcp[3692]: DHCP, proxy on subnet 192.168.11.1

ここで PXE の要求が飛んでくると…

1
2
3
4
5
6
7
8
9
10
11
12
13
14
15
16
17
18
19
20
21
22
23
24
Aug 24 07:36:42 dnsmasq-dhcp[3692]: 717457579 available DHCP subnet: 192.168.11.1/255.255.255.0
Aug 24 07:36:42 dnsmasq-dhcp[3692]: 717457579 vendor class: PXEClient:Arch:00000:UNDI:002001
Aug 24 07:36:42 dnsmasq-dhcp[3692]: 717457579 PXE(eth0) 00:0c:29:c3:88:ab proxy
Aug 24 07:36:42 dnsmasq-dhcp[3692]: 717457579 tags: eth0
Aug 24 07:36:42 dnsmasq-dhcp[3692]: 717457579 bootfile name: pxelinux/pxelinux.0
Aug 24 07:36:42 dnsmasq-dhcp[3692]: 717457579 broadcast response
Aug 24 07:36:42 dnsmasq-dhcp[3692]: 717457579 sent size: 1 option: 53 message-type 2
Aug 24 07:36:42 dnsmasq-dhcp[3692]: 717457579 sent size: 4 option: 54 server-identifier 192.168.11.109
Aug 24 07:36:42 dnsmasq-dhcp[3692]: 717457579 sent size: 9 option: 60 vendor-class 50:58:45:43:6c:69:65:6e:74
Aug 24 07:36:42 dnsmasq-dhcp[3692]: 717457579 sent size: 17 option: 97 client-machine-id 00:56:4d:38:7e:28:50:3a:f2:7f:cc:38:dc:5a...
Aug 24 07:36:42 dnsmasq-dhcp[3692]: 717457579 sent size: 36 option: 43 vendor-encap 06:01:03:0a:04:00:50:58:45:08:07:80:00:01...
Aug 24 07:36:44 dnsmasq-dhcp[3692]: 717457579 available DHCP subnet: 192.168.11.1/255.255.255.0
Aug 24 07:36:44 dnsmasq-dhcp[3692]: 717457579 vendor class: PXEClient:Arch:00000:UNDI:002001
Aug 24 07:36:45 dnsmasq-dhcp[3692]: 717457579 available DHCP subnet: 192.168.11.1/255.255.255.0
Aug 24 07:36:45 dnsmasq-dhcp[3692]: 717457579 vendor class: PXEClient:Arch:00000:UNDI:002001
Aug 24 07:36:45 dnsmasq-dhcp[3692]: 717457579 PXE(eth0) 192.168.11.54 00:0c:29:c3:88:ab pxelinux/pxelinux.0
Aug 24 07:36:45 dnsmasq-dhcp[3692]: 717457579 tags: eth0
Aug 24 07:36:45 dnsmasq-dhcp[3692]: 717457579 bootfile name: pxelinux/pxelinux.0
Aug 24 07:36:45 dnsmasq-dhcp[3692]: 717457579 next server: 192.168.11.17
Aug 24 07:36:45 dnsmasq-dhcp[3692]: 717457579 sent size: 1 option: 53 message-type 5
Aug 24 07:36:45 dnsmasq-dhcp[3692]: 717457579 sent size: 4 option: 54 server-identifier 192.168.11.109
Aug 24 07:36:45 dnsmasq-dhcp[3692]: 717457579 sent size: 9 option: 60 vendor-class 50:58:45:43:6c:69:65:6e:74
Aug 24 07:36:45 dnsmasq-dhcp[3692]: 717457579 sent size: 17 option: 97 client-machine-id 00:56:4d:38:7e:28:50:3a:f2:7f:cc:38:dc:5a...
Aug 24 07:36:45 dnsmasq-dhcp[3692]: 717457579 sent size: 7 option: 43 vendor-encap 47:04:80:00:00:00:ff

確かに、既存の DHCP サーバとやり取りして IP をリースしたり、ブートファイルの情報を送っているのがわかる。

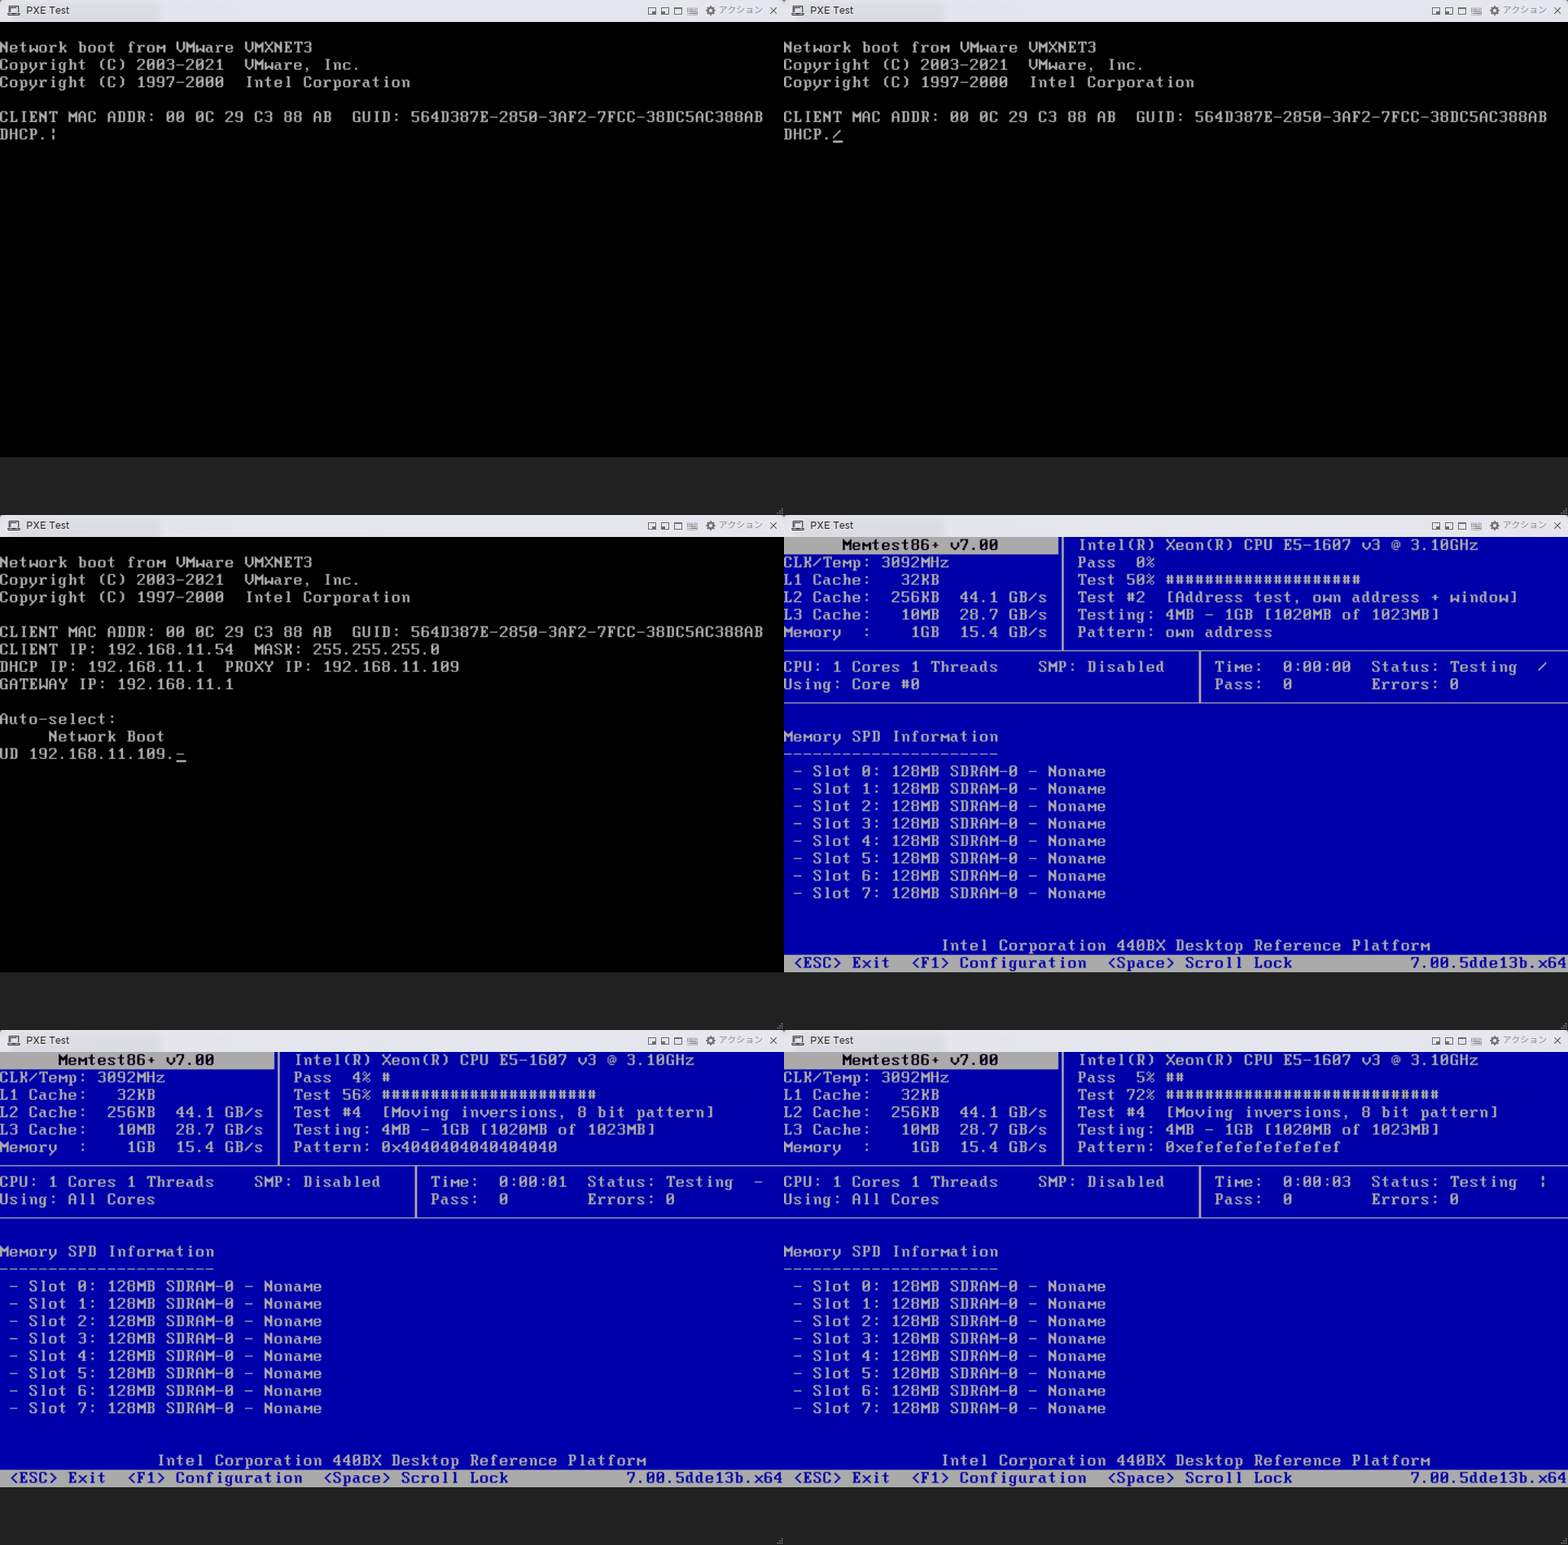
実際、正しく memtest86+ が起動した。

tftp