Introduction

何となく自宅環境のセキュリティを向上させたくなったので導入してみた。

How to do?

Install Server

インストール環境は下記

  • OS
    • Ubuntu 24.04 LTS

Installing Wazuh に従うだけの簡単セットアップ。

1
2
3
4
5
6
7
8
9
10
11
12
13
14
15
16
17
18
19
20
21
22
23
24
25
26
27
28
29
30
31
32
33
34
35
36
37
38
39
40
41
42
43
44
45
46
47
48
49
50
51
52
53
54
55
56
57
58
$ curl -sO https://packages.wazuh.com/4.14/wazuh-install.sh
$ sudo bash ./wazuh-install.sh -a
05/05/2026 13:57:15 INFO: Starting Wazuh installation assistant. Wazuh version: 4.14.5
05/05/2026 13:57:15 INFO: Verbose logging redirected to /var/log/wazuh-install.log
05/05/2026 13:57:20 INFO: --- Dependencies ----
05/05/2026 13:57:20 INFO: Installing gawk.
05/05/2026 13:57:27 INFO: Verifying that your system meets the recommended minimum hardware requirements.
05/05/2026 13:57:27 INFO: Wazuh web interface port will be 443.
05/05/2026 13:57:34 INFO: --- Dependencies ----
05/05/2026 13:57:34 INFO: Installing apt-transport-https.
05/05/2026 13:57:44 INFO: Installing debhelper.
05/05/2026 13:58:07 INFO: Wazuh repository added.
05/05/2026 13:58:07 INFO: --- Configuration files ---
05/05/2026 13:58:07 INFO: Generating configuration files.
05/05/2026 13:58:08 INFO: Generating the root certificate.
05/05/2026 13:58:09 INFO: Generating Admin certificates.
05/05/2026 13:58:09 INFO: Generating Wazuh indexer certificates.
05/05/2026 13:58:09 INFO: Generating Filebeat certificates.
05/05/2026 13:58:10 INFO: Generating Wazuh dashboard certificates.
05/05/2026 13:58:11 INFO: Created wazuh-install-files.tar. It contains the Wazuh cluster key, certificates, and passwords necessary for installation.
05/05/2026 13:58:11 INFO: --- Wazuh indexer ---
05/05/2026 13:58:11 INFO: Starting Wazuh indexer installation.
05/05/2026 13:59:57 INFO: Wazuh indexer installation finished.
05/05/2026 13:59:57 INFO: Wazuh indexer post-install configuration finished.
05/05/2026 13:59:57 INFO: Starting service wazuh-indexer.
05/05/2026 14:00:17 INFO: wazuh-indexer service started.
05/05/2026 14:00:17 INFO: Initializing Wazuh indexer cluster security settings.
05/05/2026 14:00:20 INFO: Wazuh indexer cluster security configuration initialized.
05/05/2026 14:00:20 INFO: Wazuh indexer cluster initialized.
05/05/2026 14:00:20 INFO: --- Wazuh server ---
05/05/2026 14:00:20 INFO: Starting the Wazuh manager installation.
05/05/2026 14:02:44 INFO: Wazuh manager installation finished.
05/05/2026 14:02:44 INFO: Wazuh manager vulnerability detection configuration finished.
05/05/2026 14:02:44 INFO: Starting service wazuh-manager.
05/05/2026 14:03:01 INFO: wazuh-manager service started.
05/05/2026 14:03:01 INFO: Starting Filebeat installation.
05/05/2026 14:03:25 INFO: Filebeat installation finished.
05/05/2026 14:03:29 INFO: Filebeat post-install configuration finished.
05/05/2026 14:03:29 INFO: Starting service filebeat.
05/05/2026 14:03:31 INFO: filebeat service started.
05/05/2026 14:03:31 INFO: --- Wazuh dashboard ---
05/05/2026 14:03:31 INFO: Starting Wazuh dashboard installation.
05/05/2026 14:12:41 INFO: Wazuh dashboard installation finished.
05/05/2026 14:12:42 INFO: Wazuh dashboard post-install configuration finished.
05/05/2026 14:12:42 INFO: Starting service wazuh-dashboard.
05/05/2026 14:12:43 INFO: wazuh-dashboard service started.
05/05/2026 14:12:44 INFO: Updating the internal users.
05/05/2026 14:12:50 INFO: A backup of the internal users has been saved in the /etc/wazuh-indexer/internalusers-backup folder.
05/05/2026 14:13:01 INFO: The filebeat.yml file has been updated to use the Filebeat Keystore username and password.
05/05/2026 14:13:30 INFO: Initializing Wazuh dashboard web application.
05/05/2026 14:13:32 INFO: Wazuh dashboard web application initialized.
05/05/2026 14:13:32 INFO: --- Summary ---
05/05/2026 14:13:32 INFO: You can access the web interface https://<wazuh-dashboard-ip>:443
User: admin
Password: xxxxxxxxxxxxxxxxxxxxxxxxxxxxxxxx
05/05/2026 14:13:32 INFO: --- Dependencies ----
05/05/2026 14:13:32 INFO: Removing gawk.
05/05/2026 14:13:37 INFO: Installation finished.

インストールログに従い、パスワードをメモしてから、ブラウザでアクセスしてログイン。

Wazuh login

Wazuh dashboard

install Agent

サーバだけでは脆弱性などの情報は取得されないので、クライアントに Wazuh agent をインストールする。
Installing the Wazuh agent からターゲットの OS を選びインストールする。

Windows

インストーラをダウンロードして CLI から簡単にインストールできる。
説明には書いてないが管理者権限が必要。。
また、インストール中は何も表示されない点は注意。
10.0.0.2 はサーバをインストールした IP またはホスト名を設定。

1
2
3
4
$ .\wazuh-agent-4.14.5-1.msi /q WAZUH_MANAGER="10.0.0.2"
$ NET START WazuhSvc
Wazuh サービスを開始します.
Wazuh サービスは正常に開始されました。

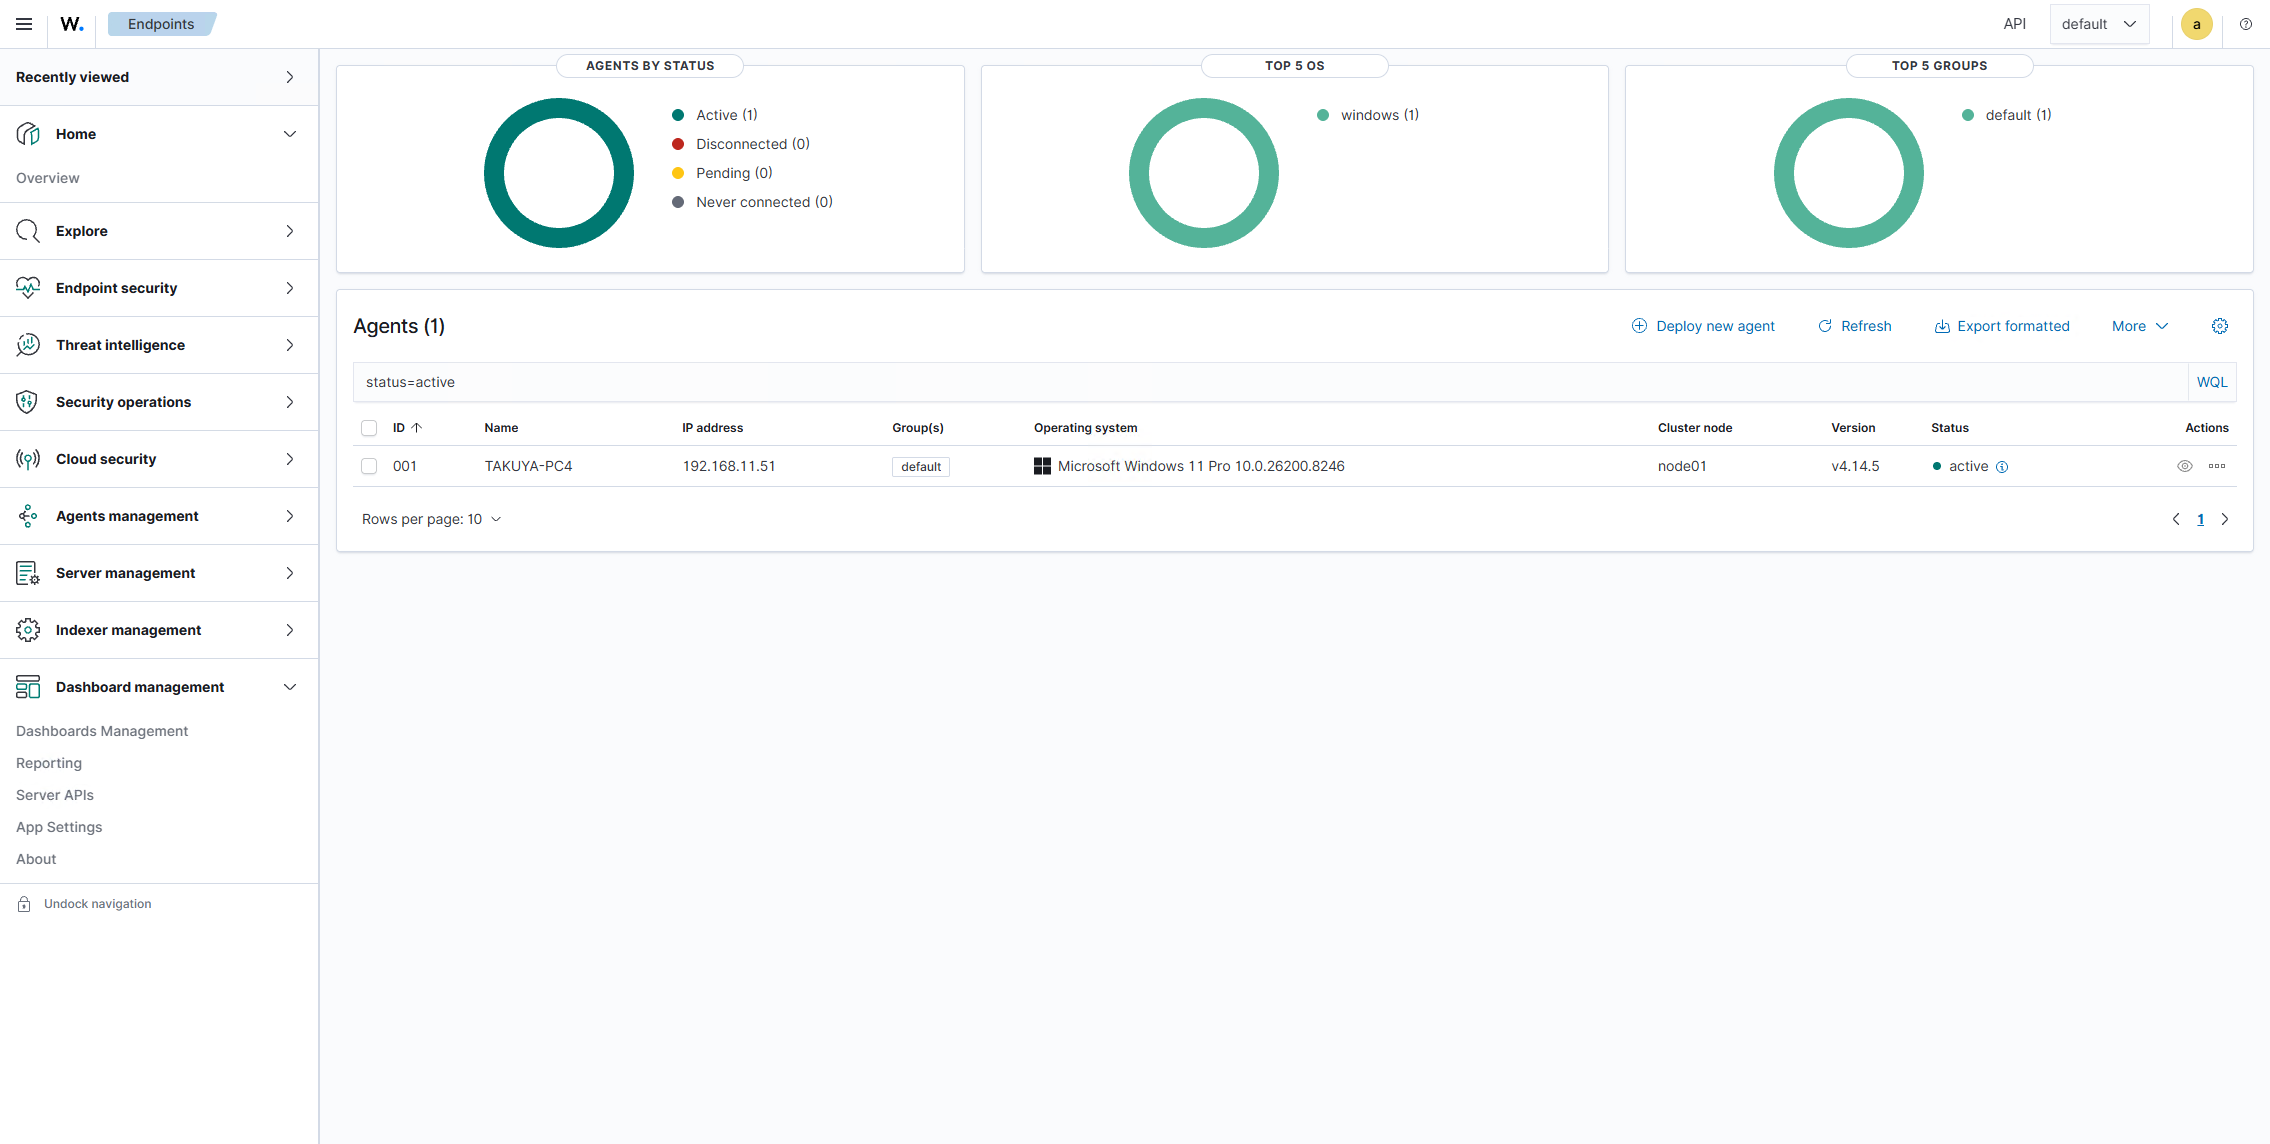
しばらくするとサーバ側に端末が追加されていることを確認できれば終了。

Wazuh agents

Wazuh agents

Linux (Ubuntu)

下記でインストールできる…はずだったが、なぜかサーバの情報が正しく設定されていなかったので、後述の /var/ossec/etc/ossec.conf を手動設定しサービスを再起動することで動作するようになった。

1
2
3
4
5
6
7
8
9
$ sudo apt install gnupg apt-transport-https
$ curl -s https://packages.wazuh.com/key/GPG-KEY-WAZUH | sudo gpg --no-default-keyring --keyring gnupg-ring:/usr/share/keyrings/wazuh.gpg --import
$ sudo chmod 644 /usr/share/keyrings/wazuh.gpg
$ echo "deb [signed-by=/usr/share/keyrings/wazuh.gpg] https://packages.wazuh.com/4.x/apt/ stable main" | sudo tee -a /etc/apt/sources.list.d/wazuh.list
$ sudo apt update
$ WAZUH_MANAGER="10.0.0.2" sudo apt install wazuh-agent
$ sudo systemctl daemon-reload
$ sudo systemctl enable wazuh-agent
$ sudo systemctl start wazuh-agent
Mac

Intel と Apple Sillicon でインストーラが違うので注意。

1
2
3
4
5
6
$ curl -sO https://packages.wazuh.com/4.x/macos/wazuh-agent-4.14.5-1.arm64.pkg
$ echo "WAZUH_MANAGER='10.0.0.2'" > /tmp/wazuh_envs && sudo installer -pkg wazuh-agent-4.14.5-1.arm64.pkg -target /
installer: Package name is wazuh-agent-4.14.5-1.arm64
installer: Installing at base path /
installer: The install was successful.
$ sudo launchctl bootstrap system /Library/LaunchDaemons/com.wazuh.agent.plist

サーバの変更

先にあった Ubuntu 向けのエージェントインストールでも触れたが、接続先を変えたい場合は設定ファイルを変更しサービスを再起動するだけで OK。
基本的に Enrollment via agent configuration に記載してあるのでそれを参考に。

Windows

設定ファイルは C:\Program Files (x86)\ossec-agent\ossec.conf

1
2
3
4
5
6
  <client>
<server>
- <address>wazuh.taktak.local</address>
+ <address>wazuh.taktak.internal</address>
<port>1514</port>
<protocol>tcp</protocol>

変更後、サービスを再起動。

1
2
$ NET STOP WazuhSvc
$ NET START WazuhSvc

設定ファイルは全 OS で共通。

Linux

設定ファイルは /var/ossec/etc/ossec.conf
変更後、サービスを再起動。

1
$ systemctl restart wazuh-agent
Mac

設定ファイルは /Library/Ossec/etc/ossec.conf
変更後、サービスを再起動。

1
$ sudo /Library/Ossec/bin/wazuh-control restart