昨日の続き。

Experimentation

1. UITextBox

前回はボタンが中央に配置するだけでしたが、今回はMonoTouch.UIKit.UITextFieldを追加します。
これは .NET でいう System.Windows.Forms.TextBoxになります。
では前回のサンプルに幾つか手を加えます。

1
2
3
4
5
6
7
8
9
10
11
12
13
14
15
16
17
18
19
20
21
22
23
24
25
26
27
28
29
30
31
32
33
34
35
36
37
38
39
40
41
42
43
44
45
46
47
48
49
50
51
52
53
54
55
56
57
58
59
60
61
62
63
public class MyViewController : UIViewController
{
UIButton button;
UITextField textField; // ADD
int numClicks = 0;
float buttonWidth = 200;
float buttonHeight = 50;
float textWidth = 200; // ADD
float textHeight = 50; // ADD

public MyViewController()
{
}

public override void ViewDidLoad()
{
base.ViewDidLoad();

View.Frame = UIScreen.MainScreen.Bounds;
//View.BackgroundColor = UIColor.White;
View.BackgroundColor = UIColor.Black;
View.AutoresizingMask = UIViewAutoresizing.FlexibleWidth | UIViewAutoresizing.FlexibleHeight;

button = UIButton.FromType(UIButtonType.RoundedRect);

button.Frame = new RectangleF(
View.Frame.Width / 2 - buttonWidth / 2,
View.Frame.Height / 2 - buttonHeight / 2,
buttonWidth,
buttonHeight);

button.BackgroundColor = UIColor.White; // Add
button.SetTitle("Click me", UIControlState.Normal);

button.TouchUpInside += (object sender, EventArgs e) =>
{
button.SetTitle(String.Format("clicked {0} times", numClicks++), UIControlState.Normal);
textField.Text = button.CurrentTitle; // ADD
};

button.AutoresizingMask = UIViewAutoresizing.FlexibleWidth | UIViewAutoresizing.FlexibleTopMargin |
UIViewAutoresizing.FlexibleBottomMargin;

View.AddSubview(button);

// ADD
textField = new UITextField();
textField.TextColor = UIColor.Black; // Add
textField.BackgroundColor = UIColor.White; // Add

textField.Frame = new RectangleF(
View.Frame.Width / 2 - textWidth / 2,
button.Frame.Y - 20 - textHeight,
textWidth,
textHeight);

textField.AutoresizingMask = UIViewAutoresizing.FlexibleWidth | UIViewAutoresizing.FlexibleTopMargin |
UIViewAutoresizing.FlexibleBottomMargin;

View.AddSubview(textField);
}

}

ボタンの上にUITextFieldが追加されました。
ビルド実行するとこうなります。

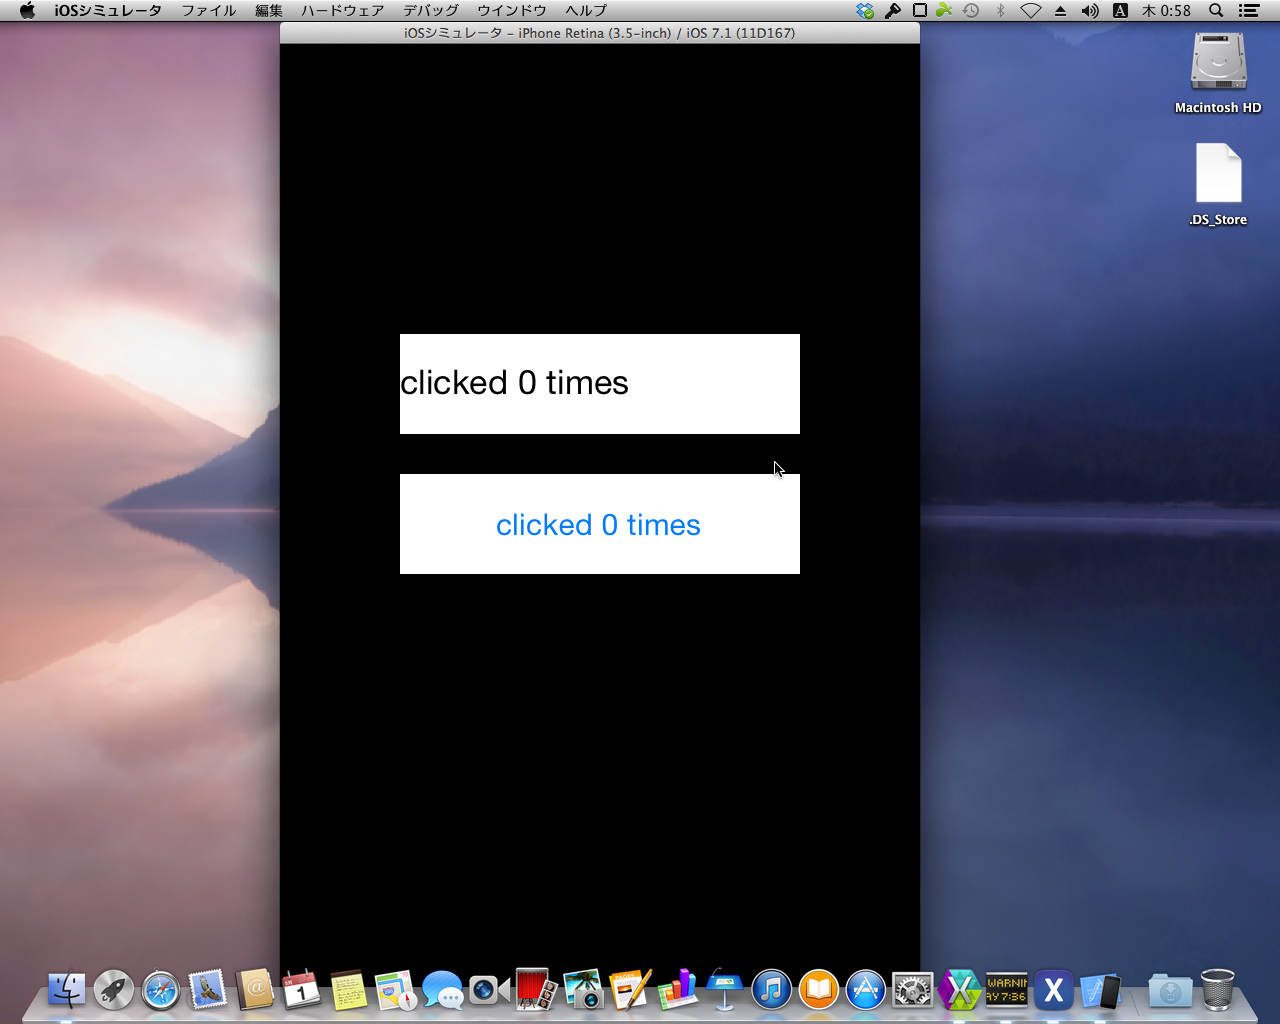
ボタンをクリックすると、ボタンのテキストがUITextFieldにコピーされます。
テキストも手入力できます。

UITextField上でEnterキーを押下すると、Select | Select Allのお馴染みのポップアップもきちんと表示されます。

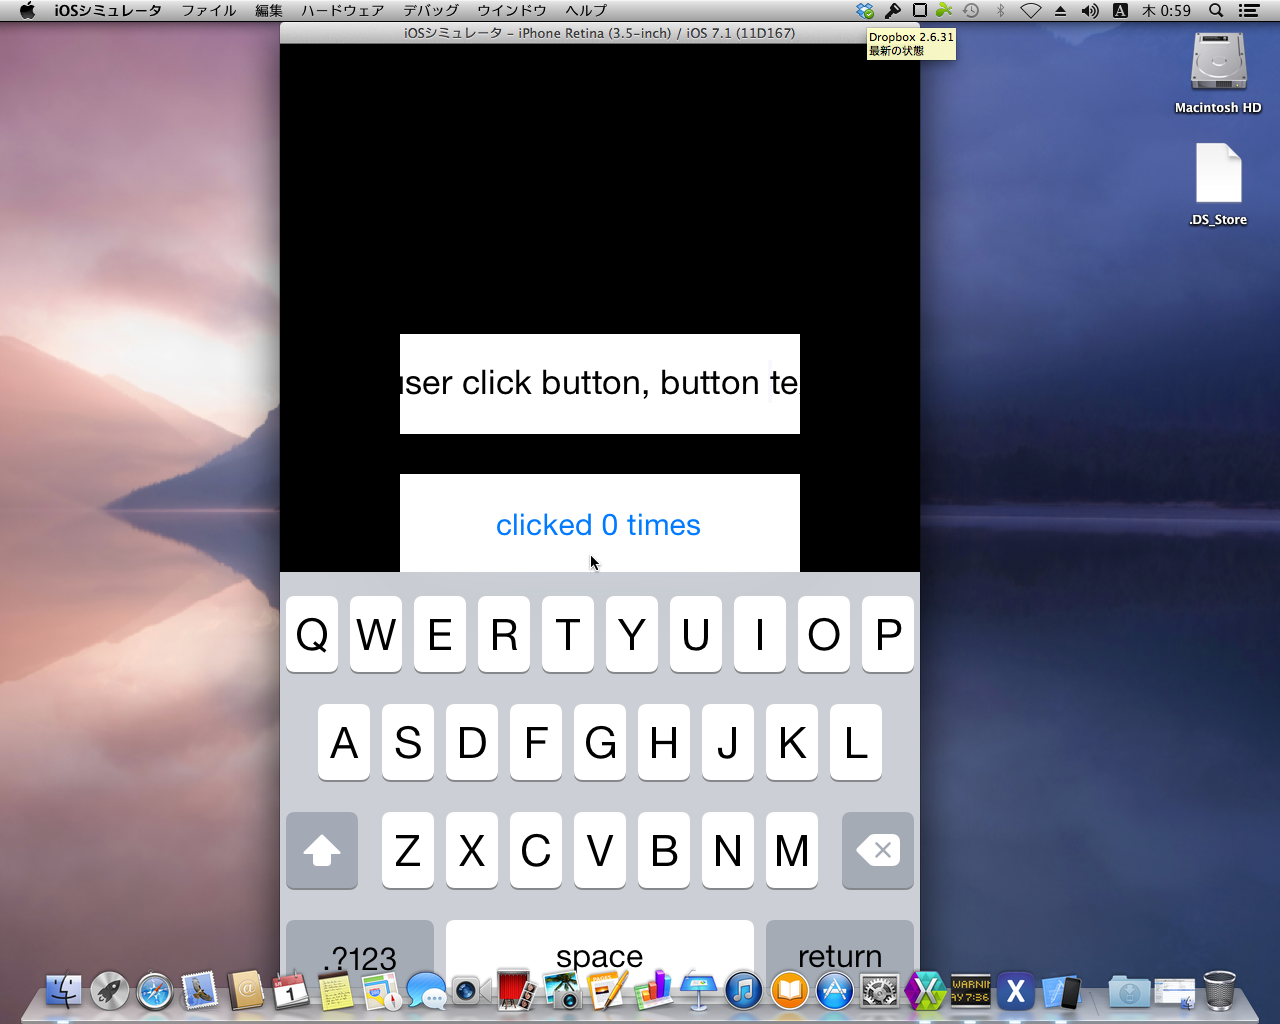
ところで、表示されたキーボードはどう非表示にするのでしょうか?

2. UITextView

もう少し手を加えます。
次はMonoTouch.UIKit.UITextViewを追加します。
これは .NET でいう System.Windows.Forms.TextBoxと同じですが、先のUITextBoxとの違いは、複数行入力が可能、読み取り専用にすることが可能という違いがあります。
さっきのサンプルを修正します。

1
2
3
4
5
6
7
8
9
10
11
12
13
14
15
16
17
18
19
20
21
22
23
24
25
26
27
28
29
30
31
32
33
34
35
36
37
38
39
40
41
42
43
44
45
46
47
48
49
50
51
52
53
54
55
56
57
58
59
60
61
62
63
64
65
66
67
68
69
70
71
72
73
74
75
76
77
78
79
80
81
82
public class MyViewController : UIViewController
{
UIButton button;
UITextField textField; // ADD
UITextView textView; // ADD
int numClicks = 0;
float buttonWidth = 200;
float buttonHeight = 50;
float textWidth = 200; // ADD
float textHeight = 50; // ADD
float textViewHeight = 100; // ADD

public MyViewController()
{
}

public override void ViewDidLoad()
{
base.ViewDidLoad();

View.Frame = UIScreen.MainScreen.Bounds;
//View.BackgroundColor = UIColor.White;
View.BackgroundColor = UIColor.Black;
View.AutoresizingMask = UIViewAutoresizing.FlexibleWidth | UIViewAutoresizing.FlexibleHeight;

button = UIButton.FromType(UIButtonType.RoundedRect);

button.Frame = new RectangleF(
View.Frame.Width / 2 - buttonWidth / 2,
View.Frame.Height / 2 - buttonHeight / 2,
buttonWidth,
buttonHeight);

button.BackgroundColor = UIColor.White; // Add
button.SetTitle("Click me", UIControlState.Normal);

button.TouchUpInside += (object sender, EventArgs e) =>
{
button.SetTitle(String.Format("clicked {0} times", numClicks++), UIControlState.Normal);
textField.Text = button.CurrentTitle; // ADD
};

button.AutoresizingMask = UIViewAutoresizing.FlexibleWidth | UIViewAutoresizing.FlexibleTopMargin |
UIViewAutoresizing.FlexibleBottomMargin;

View.AddSubview(button);

// ADD
textField = new UITextField();
textField.TextColor = UIColor.Black; // Add
textField.BackgroundColor = UIColor.White; // Add

textField.Frame = new RectangleF(
View.Frame.Width / 2 - textWidth / 2,
button.Frame.Y - 20 - textHeight,
textWidth,
textHeight);

textField.AutoresizingMask = UIViewAutoresizing.FlexibleWidth | UIViewAutoresizing.FlexibleTopMargin |
UIViewAutoresizing.FlexibleBottomMargin;

View.AddSubview(textField);

// ADD
textView = new UITextView();
textView.TextColor = UIColor.Black; // Add
textView.BackgroundColor = UIColor.White; // Add
textView.Text = "This is UITextView!!!";

textView.Frame = new RectangleF(
0,
textField.Frame.Y - 20 - textViewHeight,
View.Frame.Width,
textViewHeight);

textView.AutoresizingMask = UIViewAutoresizing.FlexibleWidth | UIViewAutoresizing.FlexibleTopMargin |
UIViewAutoresizing.FlexibleBottomMargin;

View.AddSubview(textView);
}

}

最上部にUITextViewが追加されました。
複数行テキストを入力できます。

ちなみに、UITextView.Editable プロパティfalseをセットすることで読み取り専用にできます。

Conclusion

他にもできることはありますが、簡単にまとめると、

  • MonoTouch.UIKit.UITextBoxは単一行のSystem.Windows.Forms.TextBox
  • MonoTouch.UIKit.UITextViewは複数行のSystem.Windows.Forms.TextBoxで読み取り専用設定も付与可能

という感じです。

何はともあれ、どのコントロールがどこにあるか、どういうことが出来るのかは覚えておかないと話になりません。
あと、UIButtonの表示文字列はSetTitle メソッドで設定したからGetTitle メソッドで取得可能かと思ったら、CurrentTitle プロパティで取得可能とかわかりにくすぎです。
この設計はWinFormsからWPFへ移行するときの関門に通じるものがあります。